Search
Close this search box.
OUR TIPS TO CREATE A COHESIVE BATHROOM DESIGN PLAN

With every new house we design, the desire to create a liveable space that not only functions well but looks amazing too is central to our planning. It’s a worthwhile exercise to spend a little extra time on your bathroom design plan to ensure it functions well for your family’s needs!

Then comes the fun part, choosing all the selections.

Creating cohesion between the bathrooms in your home will add value to your home but they don’t need to be as coordinated as the Kardashian Klan Kristmas Kard. Let’s take a closer look at Dream Home 7 where we created three different bathrooms. We pulled-off an extremely cohesive look and feel throughout the entire home despite the differences.

WHERE TO START

Always, always, always start with your vision board, a collection of your favourite images that you instantly fall in love with. Hopefully the love affair will last longer than Kim’s 72-day marriage to Kris Humphries. #ouch Sorry, was that too much?

There are so many design selections to make in the bathrooms, so a vision board will really help you keep on track throughout the whole process.

BENCHTOPS

The budget can play a big part in the decision process; every home we tackle we will have a different number to work with. We knew early on in Dream Home 7 that we wanted to use different shades of green cabinetry throughout, that meant we needed a benchtop that would work with each of these colours. The bathroom is a great room to be take a risk and add a splash of colour.

Did you know that when using engineered stone you pay per slab? That’s why we nearly always use the same type in every bathroom, kitchen, and laundry throughout the home as it saves wastage and us the coin. We chose Caesarstone’s new Vivid White. Knowing we wanted to have some fun with coloured cabinetry and textured tiles, we landed on Vivid White for it’s simple, sophisticated and timeless appeal.

modern-design-cabinetry

TILES

Tiles are my weakness. I’m not going to lie; I fell in love with so many TILES when I first walked into the Color Tile showroom. If you’ve watched Episode 4 of Dream Home 7 you would know my bravest tile choices were made in this home! It could have ended so badly. That’s why it was even more important to keep cohesiveness. In the end, between the three bathrooms, kitchens, and laundry we used, wait for it…NINE different tiles! Shock horror.

But it turned out alright, didn’t it?!

Here’s what we picked and why –

MAIN BATHROOM & GUEST BATHROOM

🛁 We used the same 300 x 600 white matte wall tiles

🛁 On the floors we used the same lusso naturale 300 x 600

(We also used a smaller version in a double herringbone pattern on the laundry floor)

HOT TIP Don’t forget to factor in natural light when making your selections!

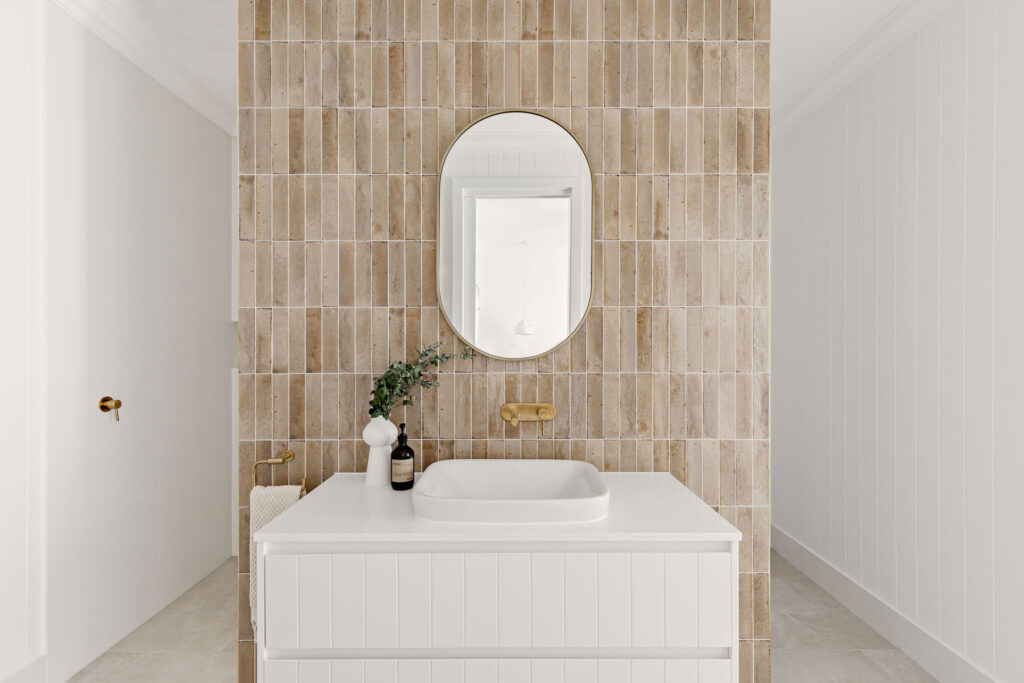
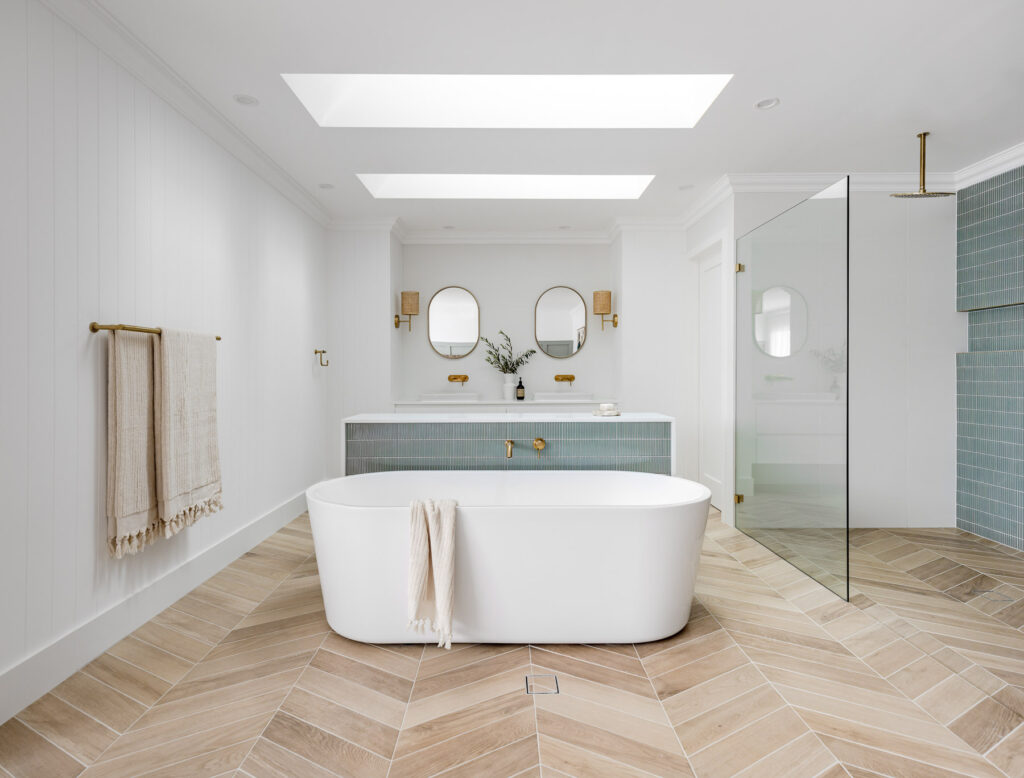
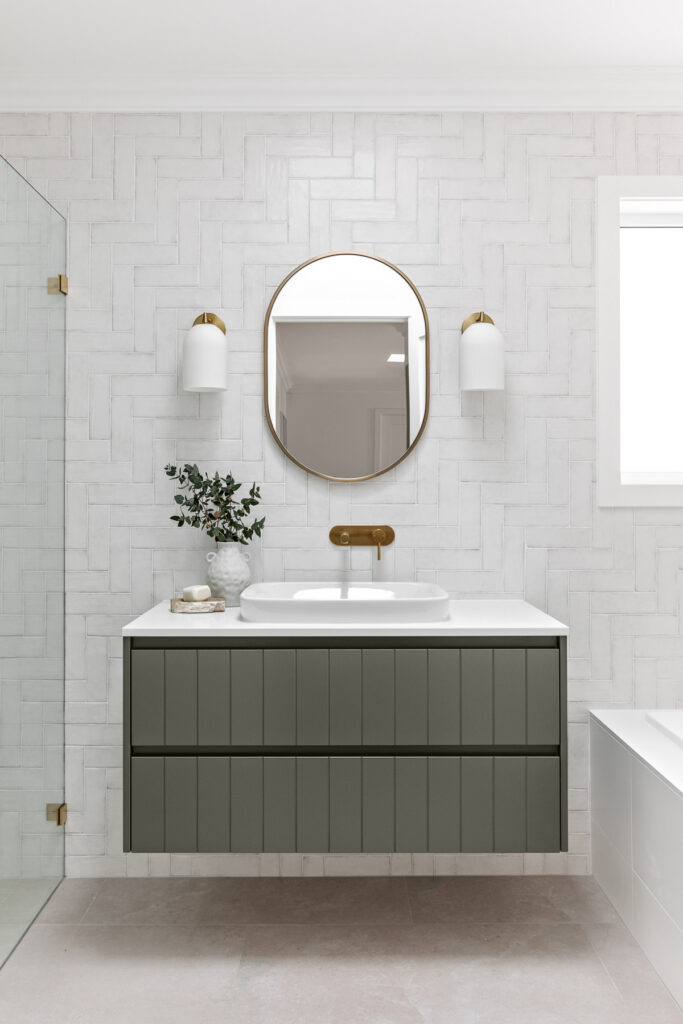
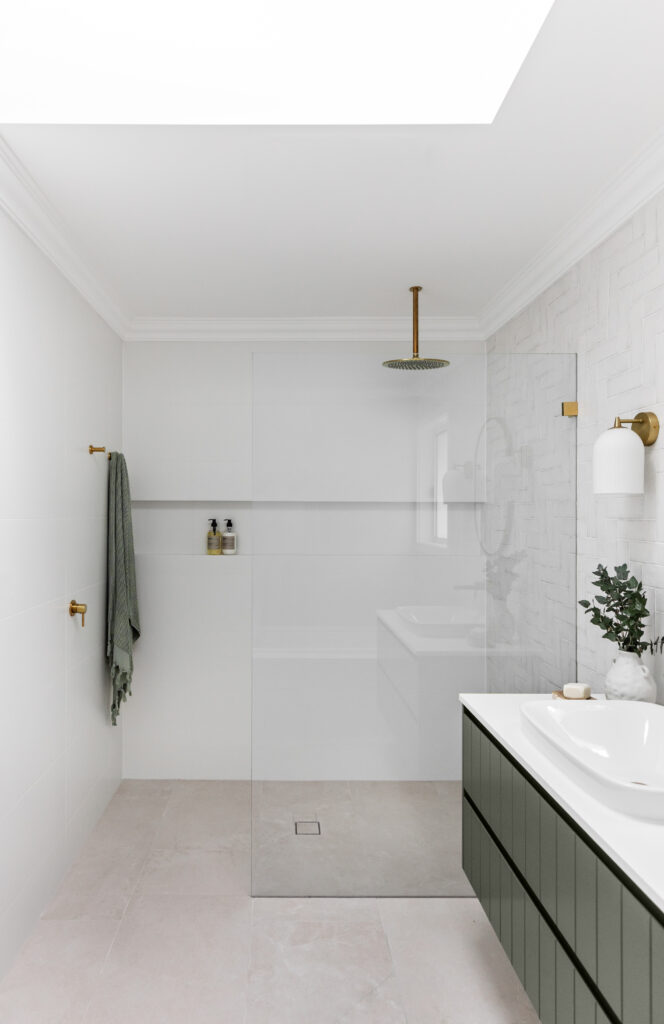
🛁 The white feature tile in the main bathroom was chosen because this space faces southeast and does not receive a lot of direct sunlight (the skylight helps though). Laying this particular tile in a herringbone pattern directs the eye up and creates a sense of height in the room.

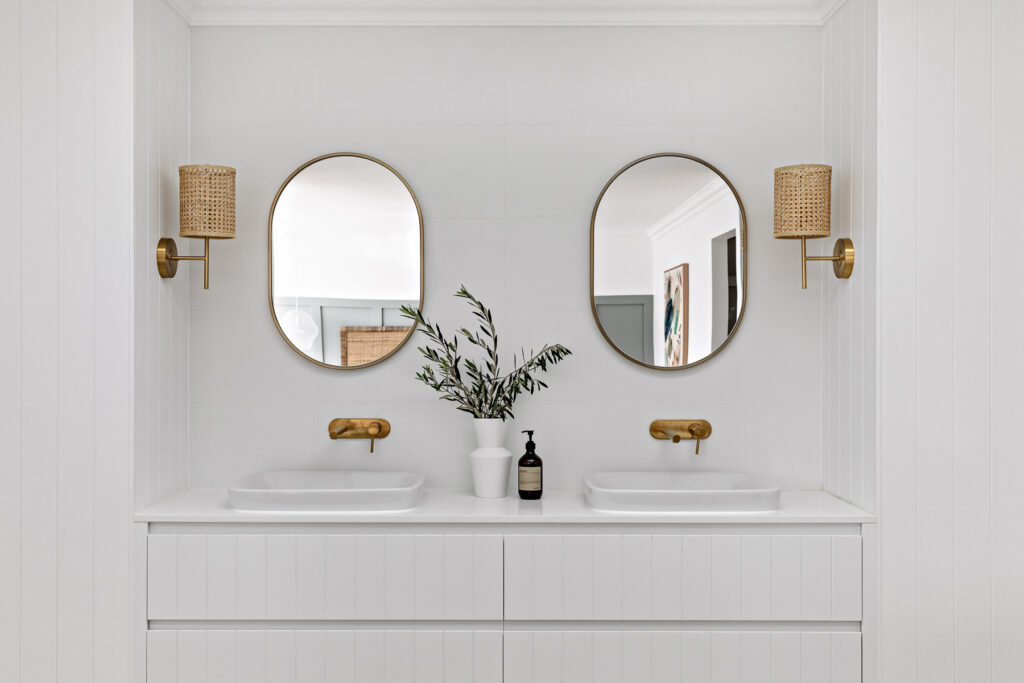
🛁 On the other hand, the guest bathroom downstairs receives far more natural light. The look beige tiles create more warmth in this space and we choose to lay it in a vertical stack bond pattern. This pattern gives us a clean edge on the sides given its a blade wall and it repeats the lines of the VJ panelling and Country V profile of the cabinetry.

MASTER ENSUITE

The open plan layout of our showstopping Master En-suite played a big part in where we placed our tiles. The Treverksoul Neutral floor tile laid in the classis chevron was the perfect choice for such an open bathroom like this one. The colour was very similar to the vinyl flooring used in the main living areas of the home, so whilst different to the other bathrooms, it’s still cohesive with the rest of the home. See what we did there.

We continued the green love affair with the beautiful sage finger tiles. These tiles were nearly identical to the feature wall colour we used in the Master Bedroom #totalfluke. We chose to use these on the dwarf fall behind the bath and the shower wall, the perfect place to stand out as a feature!

Keeping it similar to the guest bathroom, we used the VJ wall panelling, and the classic 300 x 600 white matte wall tiles in ALL three bathrooms.

TYING IT ALL TOGETHER

Despite using so many different tiles throughout the bathrooms in Dream Home 7, we managed to tie it all together with FOUR common design elements that we chose very early on in the design process.

🛁 Vivid white benchtops

🛁 Brushed gold tapware

🛁 White semi-inset basins

🛁 Brushed gold pill mirrors

(To match the window in the home office)

There you have it! Don’t be afraid to get creative and mix things up in your bathrooms but remember, for resale value play it a little safe and make sure you design bathrooms that are cohesive.

Which bathroom was your fave? Tell us below

Heather xx

Facebook
Twitter
LinkedIn
Pinterest
Email
More ARTICLES

Leave a Comment

Your email address will not be published. Required fields are marked *

Scroll to Top